PowerShell - Microsoft Azure
Installing Microsoft Azure PowerShell on Windows 10

Overview
Azure PowerShell provides a set of cmdlets that use the Azure Resource Manager model for managing your Azure resources. Azure PowerShell uses .NET Standard, making it available for Windows, macOS, and Linux. Azure PowerShell is also available on Azure Cloud Shell.
This new module is written from the ground up in .NET Standard. The Az module is now the envisioned way to interact with Azure through PowerShell.
Requirements
PowerShell Version
Azure PowerShell works with PowerShell 5.1 or higher on Windows 10, or PowerShell 6 on any platform.
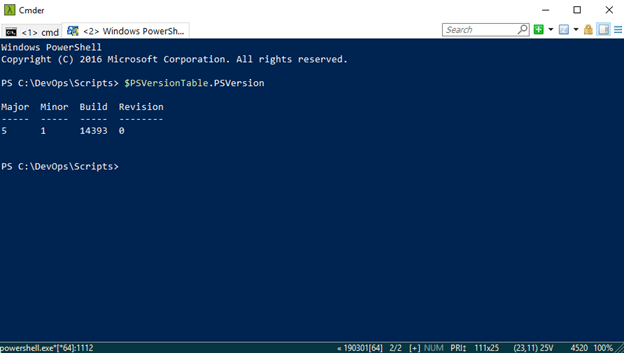
1.To verify your PowerShell version, type the PowerShell command at the console and press enter:
$PSVersionTable.PSVersion
.NET Framework
Note - If you are using PowerShell 5 on Windows 10, you will also need .NET Framework 4.7.2 installed. Using .NET Standard allows Azure PowerShell to run under PowerShell 5 on Windows or PowerShell 6 on any platform.
List All Modules
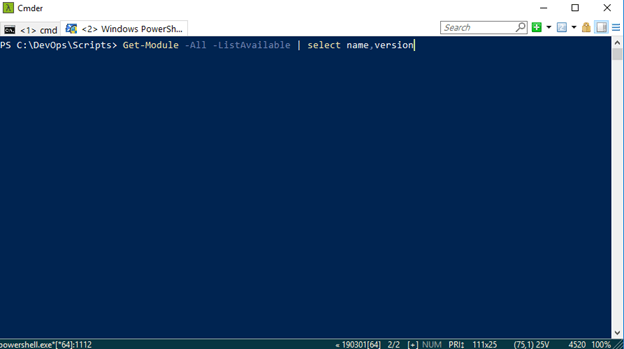
Before we install the Microsoft Azure PowerShell , let’s double check to see if the Azure PowerShell module has already been installed by getting a list of all installed PowerShell Modules and their version number.
2.Execute the following at the command line and press enter:
Get-Module -All -ListAvailable | select name,version
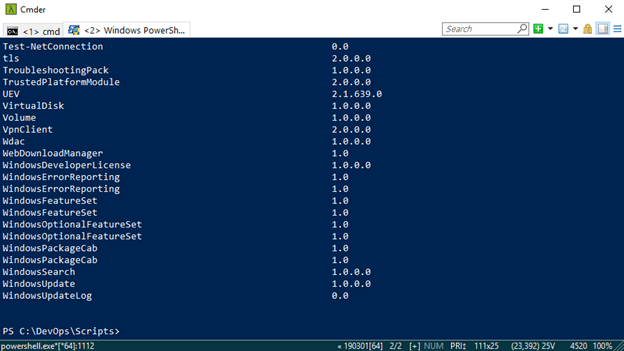
The script output is Alphabetical order so scroll up and check if Microsoft Azure PowerShell is installed
Once you have checked the output and validated that Microsoft Azure PowerShell is not installed.
Next let’s install Azure PowerShell
Install Azure PowerShell Module
3.Now to install Microsoft Azure PowerShell at the command line execute the following:
Install-Module -Name Az -AllowClobber
Parameters
-Name - Specifies the exact name of module to install from the online gallery, in this case “ Az ” for Microsoft Azure PowerShell
-AllowClobber - Allows you install module that contains commands those have the same names as commands that already exists.
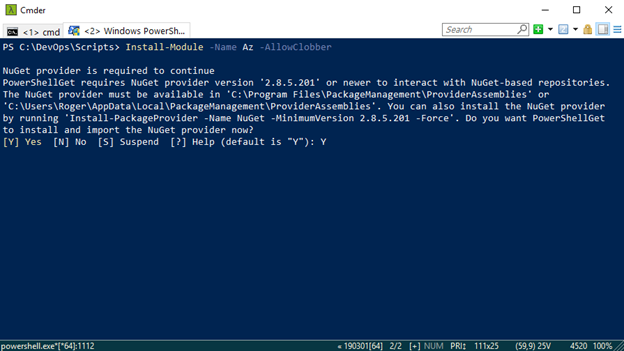
4.When prompted about the Nuget provider type “ Y ” and press enter
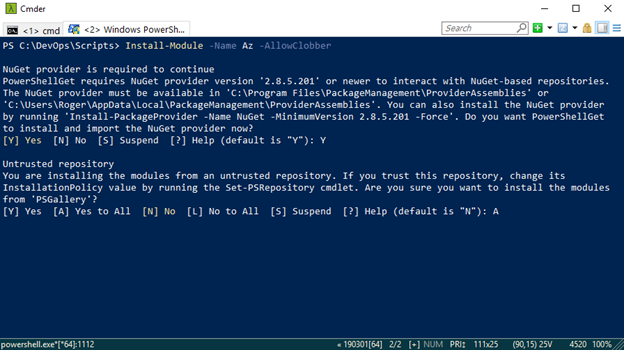
5. Untrusted repository prompt type “ A ” and press Enter
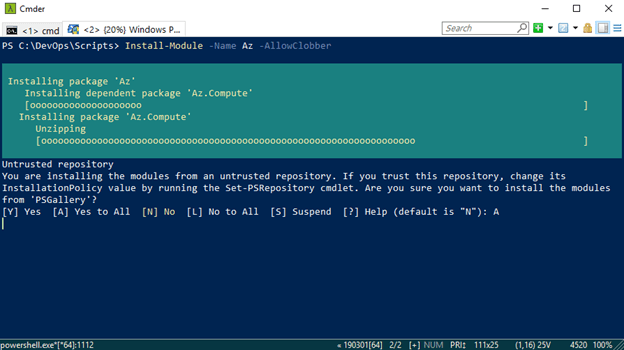
Note - See below message Installing package ‘Az’ showing the progress of the installation
Import Module
Once the install is complete let’s import the module to give it a test run.
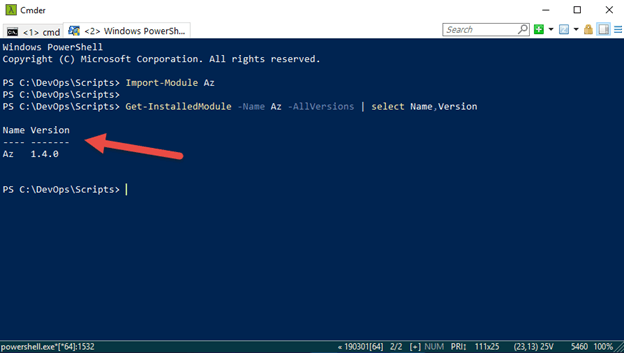
6.Execute the following command to Import the Module:
Import-Module Az
Note - importing the module does not provide any output unless there was an error
Check Version Installed
Next let’s check the version of Microsoft Azure PowerShell installed
7.Type the following and press enter:
Get-InstalledModule -Name Az -AllVersions | select Name,Version
Parameters
-Name - Specifies an array of names of modules to get.
-AllVersions - Indicates that you want to get all available versions of a module.
Finally, once we retrieve the specified Module(s) we can then with the pipe command “ | ” select the name and version to output to the console display.
Validate Azure PowerShell Connection
Ok the Azure PowerShell is now installed, let’s try connecting to the cloud to make sure it installed correctly.
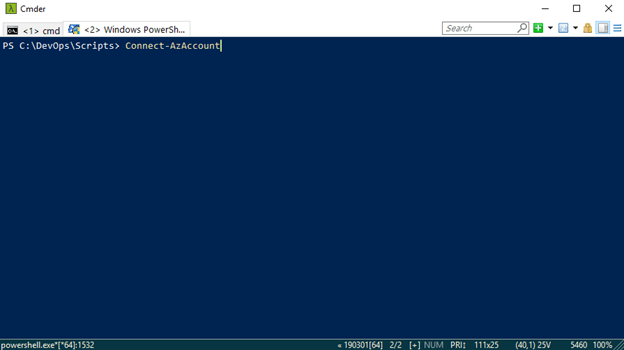
8.At the command line enter the following and press Enter:
Connect-AzAccount
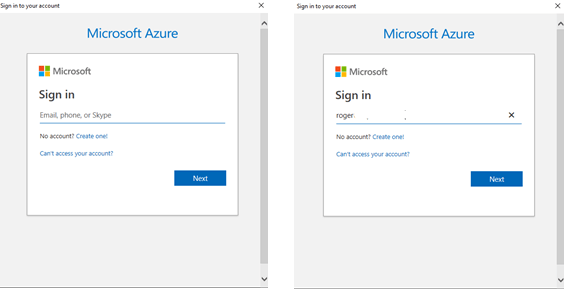
The Sign into your account window will be displayed, which is a great improvement from the previous versions before.
9.Enter your Microsoft credentials with the correct permissions to connect to the Cloud
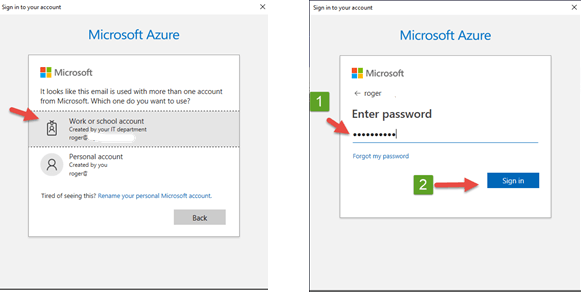
10.Select the Work or school account
11.Then enter your password and click the Sign in button
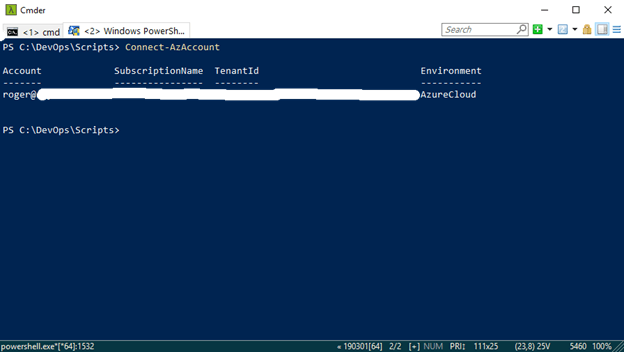
There you go, your now connected to the cloud and should receive a similar message like the following one below:
List All Modules
One thing to mention here is that Microsoft Azure PowerShell is more than just one PowerShell Module, it’s a suite of Modules that enables you to control and manage the power of the Microsoft Azure Cloud.
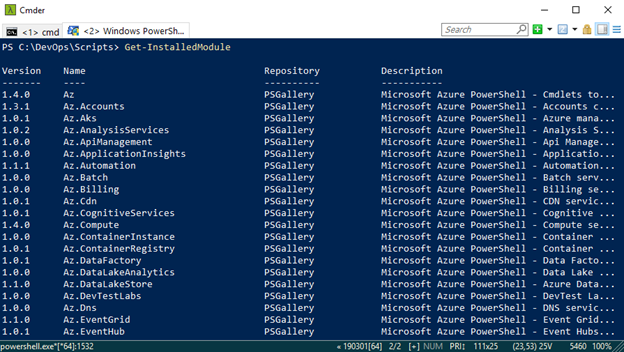
Now that we have installed and checked the version of Microsoft Azure PowerShell , we can list all the modules installed with it.
12.So, to list all the modules that are installed on a computer we type the following command and press enter:
Get-InstalledModule
Now we see below several modules related to Microsoft Azure PowerShell
Commands in a Module
Let’s go a little deeper now, we can see all the associated Modules within the Microsoft Azure PowerShell, such as Az.Dns , Az.Compute , Az.Accounts …. etc.
But let’s see how we can list all the commands in one of the above specified Azure Modules . We will take the Az.Compute to list all the cmdlets within this module.
13.To list the commands in a PowerShell Module we type the follow command and press enter:
Get-Command -Module Az.Compute
Parameters
-Module - Specifies an array of module(s).
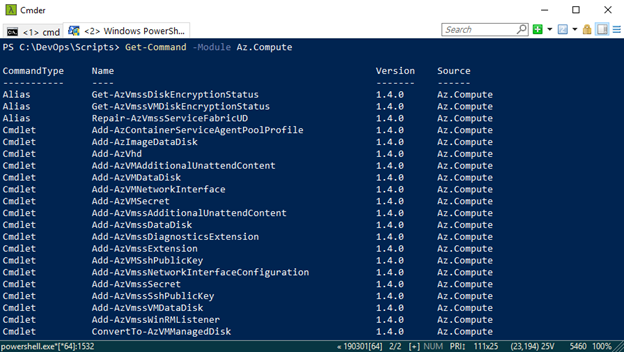
As you can see above, all the Command types are listed to
learn more about each of them, use the Help
command.
Help with a Cmdlet
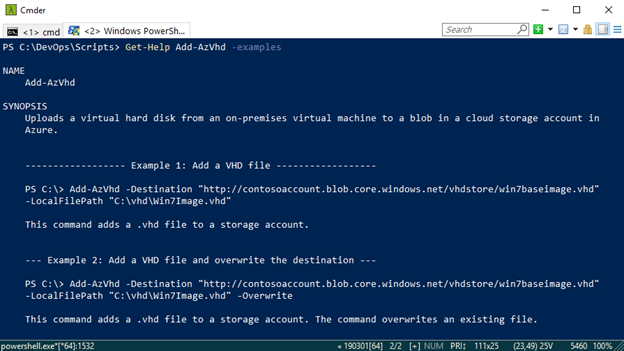
This will enable you to learn more about the command and how it can be utilized. Let’s take the Cmdlet - Add-AzVhd to see how it can be used.
14.At the command line the following and press enter:
Get-Help Add-AzVhd
See the Help information for the Cmdlet Add-AzVhd displayed below:

This to me is the meat and potatoes of learning PowerShell and getting to know what each cmdlet can do, Get-Help is your best friend. From understanding what the command is used for, to getting examples of how to use the command is a great way to learn.
Examples
The Examples part of the using the Get-Help command is a really important section to learn how to use the command with the examples provided, as a starting point.
To see Examples of how to use the command type the follow at the command line and press enter:
Get-Help Add-AzVhd -examples
Parameters
-examples - The Examples parameter displays only the NAME, SYNOPSIS, and all Examples.
See examples below:
So, in this Journey we, checked the requirements for installing Microsoft Azure PowerShell , Installed the Modules and verified the installation. We then listed all the Modules to see what was installed with the Microsoft Azure PowerShell . And finally, to get a little deeper we used the Get-Help command to get some detailed information on the use and examples of how to use the cmdlet.
Bye for now 😊